Here are some resources that may help you with your own chainmaille projects. I don’t have any connection with any of the manufactures or retailers of the commercial products listed below, other than as a buyer. The information about commercially available products is for information purposes to demonstrate some of the tools and resources I use.
- Chainmaille Aspect Ratios
- Aspect Ratio Calculator (UPDATED 1/5/2014)
- Wire Length Calculator
- Tool Magic
- Felt Work Pad
- Magnifying Lamp
- Pepe & Flexishaft (for cutting jump rings)
- Jewelry File
- Tumbler
- Digital Scale
- Ring Storage
- Jewelry Care and Cleaning
- Chainmaille Tutorials
- Favorite Suppliers
Chainmaille Aspect Ratios for Various Weaves
These are the ring specifications that I prefer when making various weaves. In the details below, I used the following acronyms:
AR = Aspect Ratio
ID = Inner diameter
GA = Gauge (in American Wire Gauge, AWG)
This list provides my preferred jump ring size for each weave, along with the aspect ratio. Of course, with the aide of the Aspect Ratio Calculator (below), you can change the chainmaille ring sizes and gauge and make your pieces just as nice.
WEAVE: Preferred AR (sample ring details), sample with these details
- Tryzantine Aspect Ratio: 5.5 (4.5 mm ID, 20 GA)
- Box Chain Aspect Ratio: 4.5+ (4.5 mm ID, 18 GA) see sample
- Byzantine Aspect Ratio: 3.7 (3 mm ID, 20 GA) see sample
- Full Persian Aspect Ratio: 5.5 (4.5 mm ID, 20 GA) see sample
- Perfect Jens Pind Linkage (JPL) Aspect Ratio: 3.1 (2.5 mm ID, 20 GA; 3 mm, 18 GA) see sample
- Reverse Tao Flower Aspect Ratio: 7.4 (7.5 mm ID, 18 GA) see sample
- Rondo a la Byzantine Aspect Ratio: 3.9 & 5.9 (4 mm & 6 mm ID, 18 GA) see sample
- Turkish Round Aspect Ratio: 3.9 (4 mm ID, 18 GA) see sample
- Viper Basket Aspect Ratio: 5.6 & 8.6 (4.5mm & 7.0 mm ID, 18 GA) see sample
- Half Persian 4 in 1 Aspect Ratio: 5.6 (4.5 mm ID, 20 GA) see sample
Aspect Ratio Calculator
My Excel calculator for Inner Diameter (ID), Gauge (GA), and Aspect Ratio (AR). I use this every time I’m making a new piece. I created this calculator because I needed a way to ensure I used the right ring size and wire gauge for beautiful-looking chain. I hope you find it useful, too, as you work on your own projects.
Download/open the Excel Ring Calculator (file name: RingCalculator-2.xls)
(1,629 downloads as of 3/15/2015)
It also does the math for various measurement conversions, such as inch to mm, inch fraction to inch decimal, inch fraction to mm, troy ounce to regular ounce, and weight to length, and more.
The AR is the most important number to chainmaille. With the right AR, your pieces won’t be too loose or too tight. If the AR is too low, you might not be able to fit all the rings you need or the piece won’t be flexible. If it is too high (a sign of amateur craftmanship), the rings will be floppy, and the chain won’t have a professional appearance.
Here’s what it looks like when opened (click for full view):
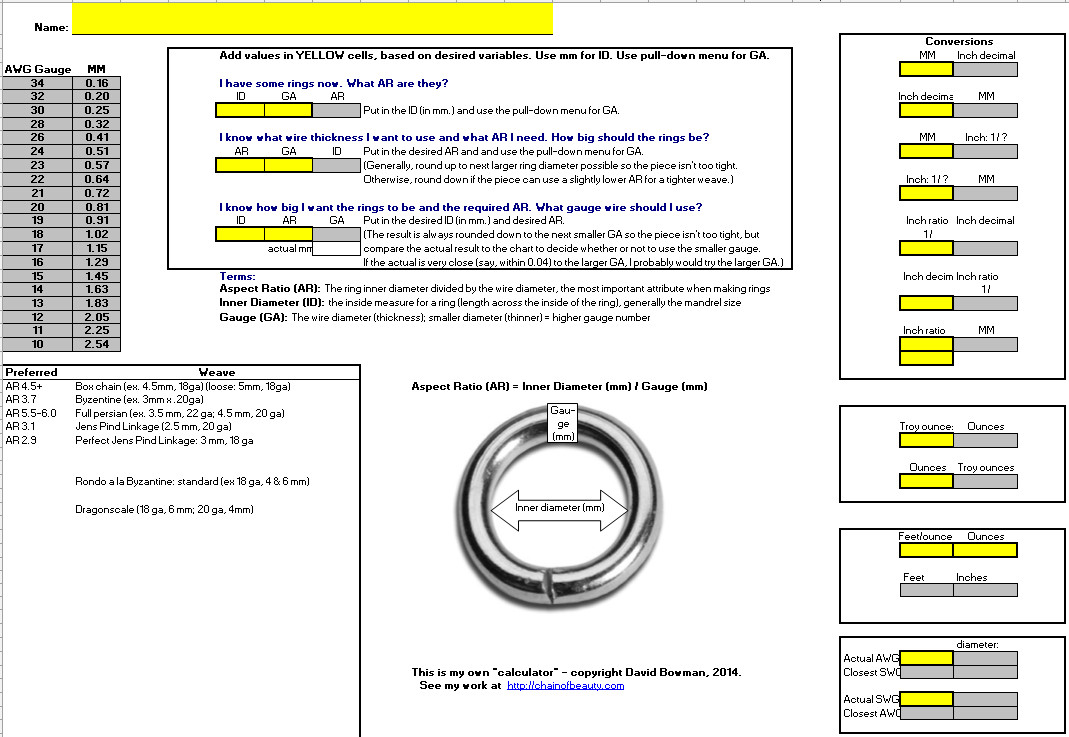
Screenshot of the Excel Ring Calculator
For a practical example of using the calculator, with images for each step, see this post: Aspect Ratio Calculator Practical Example
What the calculator will do for you:
- Enter the desired ID and GA, and the calculator will tell you what AR will result.
- Enter the desired AR and GA, and the calculator will tell you what ring size to use.
- Enter the desired AR and ID, and the calculator will tell you what GA you need. (This is the calculation I use most frequently.)
The calculator has a place for you to record desired ARs and chainmaille weave names so you can record and remember what AR you need. I added a few sample weaves and recommended ARs just to get you started.
Wire Length Calculator
You have just made or received a piece of chainmaille jewelry, and you want to make another one. How much wire will you need? If you know the weight of the jewelry, this Excel worksheet will do the math and tell you the length of the wire in the jewelry. (You can read more about the calculator here.)
Download the Wire Length Calculator
Here is what it looks like:

Screen shot of the calculator. Click for larger view.
To use this weight-to-length calculator:
- Determine the type of wire: silver plate (or copper), sterling silver, or gold-fill
- Enter the weight of the jewelry in regular ounces (not troy ounces)
- Enter the wire gauge using the pull-down menu: 16, 18, 19, 20, 21, 22, 24
The Benefit of Using This Calculator: When you do these three steps, the calculator will tell you the length of wire in the jewelry. Now you know how much wire you will need for your next project.
Tool Magic
Took Magic puts a hard, rubbery coating on the ends of tools. I dip my pliers in it so I don’t scratch my rings and so I can keep a good grip on the rings. I think this is necessary for producing quality chainmaille. If you’re using coated, plated, or annodized wire of any type, this will also keep your pliers from scratching off the outer surface.
Tool Magic does wear down and become frayed after a while (20 – 40 minutes, depending on the piece). When it does, I peel it off and re-dip the pliers. It takes about 2 hours to dry, so I keep 3 pairs of pliers. This lets me keep going while one pair is drying.
A jar lasts quite a while because a single coating doesn’t use very much. It is available from many sources and shouldn’t cost more than $5 – $8 dollars.

Felt Work Pad
I picked this pad up in the beading section of a local hobby store. Apparently, they’re pretty common for beaders. They work great for chainmaille, too. The rings don’t roll around, and the pad is just “mushy” enough that I can use an open ring to hook underneath closed rings, which makes picking up rings a lot easier. Cost: about a dollar or two.

Magnifying Lamp
This is an absolute must for me. The light is decent, and the magnifier helps me see whether my rings are closing properly, both vertically and laterally. The magnifier is also good for making sure I’m weaving the rings through the correct openings. Overall, this magnifying lamp has improved my weaving speed and the quality of the finished pieces. The cost was about $30.
The only problem with this particular model is that the cover flap (which is supposed to cover the magnifier when not in use) broke off easily and early. This wasn’t a big deal for me.

Ring Cutting: the Pepe
I use the Pepe for making rings. It has a hand crank for coiling wire, mandrels ranging from 2.5 mm to 12 mm, a slotted mount for holding the wire coils while cutting, and a head piece for the flexishaft that keeps the blade aligned with the slot in the mount. My model also came with the Flexishaft. With 20 gauge wire, I can make almost 90 rings per coil. I generally make 500 – 800 rings at a time. My cost for the Pepe and Flexishaft combo: $200 (plus shipping)
4 Quick tips for using the Pepe:
(Long Version of Tips for Using the Pepe Jump Ring Maker / Flexishaft Combo)
- Don’t tighten the top of the cutting holder too much; just make it tight enough to hold the rings down. Otherwise, the outer rings will get pushed down or flattened, and your blade will bind up.
- Forget the paste or stick-type lubricant. A couple of drops of dish soap smeared over the top of the coil will work just as well. Either way, you’ll have to rinse your rings, so you might as well make it easier.
- Larger mandrels have a little hole in them, which you place near the crank, to hold the wire in place. Ignore it. Just feed a some wire into the gaps where the crank holds the mandrel. You have to do this for smaller mandrels, anyway. It’s much easier to slip the coil off the mandrel this way.
- Keep your blade speed up. If it slows down, stop pushing the blade forward, let it get back to speed, and then continue a bit more slowly. A faster blade speed leaves fewer burrs on the rings.

Jewelry File
A file is necessary for removing any burrs from the cuts. This prevents the piece from scratching the skin or from catching on clothing. Also, when the cuts are filed smooth, they close more easily and accurately. Cost: I bought mine from a local jewelry store for a couple of bucks.

Tumbler
My workshop now includes a 3-pound Lortone Tumbler. I’ve been working with sterling silver more frequently and wanted a tumbler to give those pieces a high, professional shine. Tumbling is the way to do it. Note: No tumbling for plated materials, although filled wire should be fine.
Other accessories:
- 2 pounds of stainless steel mixed shot (stainless steel doesn’t rust and will last pretty much forever);
- burnishing liquid (1 teaspoon per use; a few drops of dish soap will work just as well);
- cheap mesh strainer (for rinsing the shot after use).
Does it really make silver more shiny than hand polishing? Oh, yes! I was very pleased when I saw how nice the first pieces looked after tumbling. Even tarnished, dirty silver looks great after tumbling. I tumble new pieces for about 30-40 minutes, and for another 20 minutes just prior to shipping or showing. Cost: I got mine for 68 bucks.

Lortone tumbler with a handful of steel shot
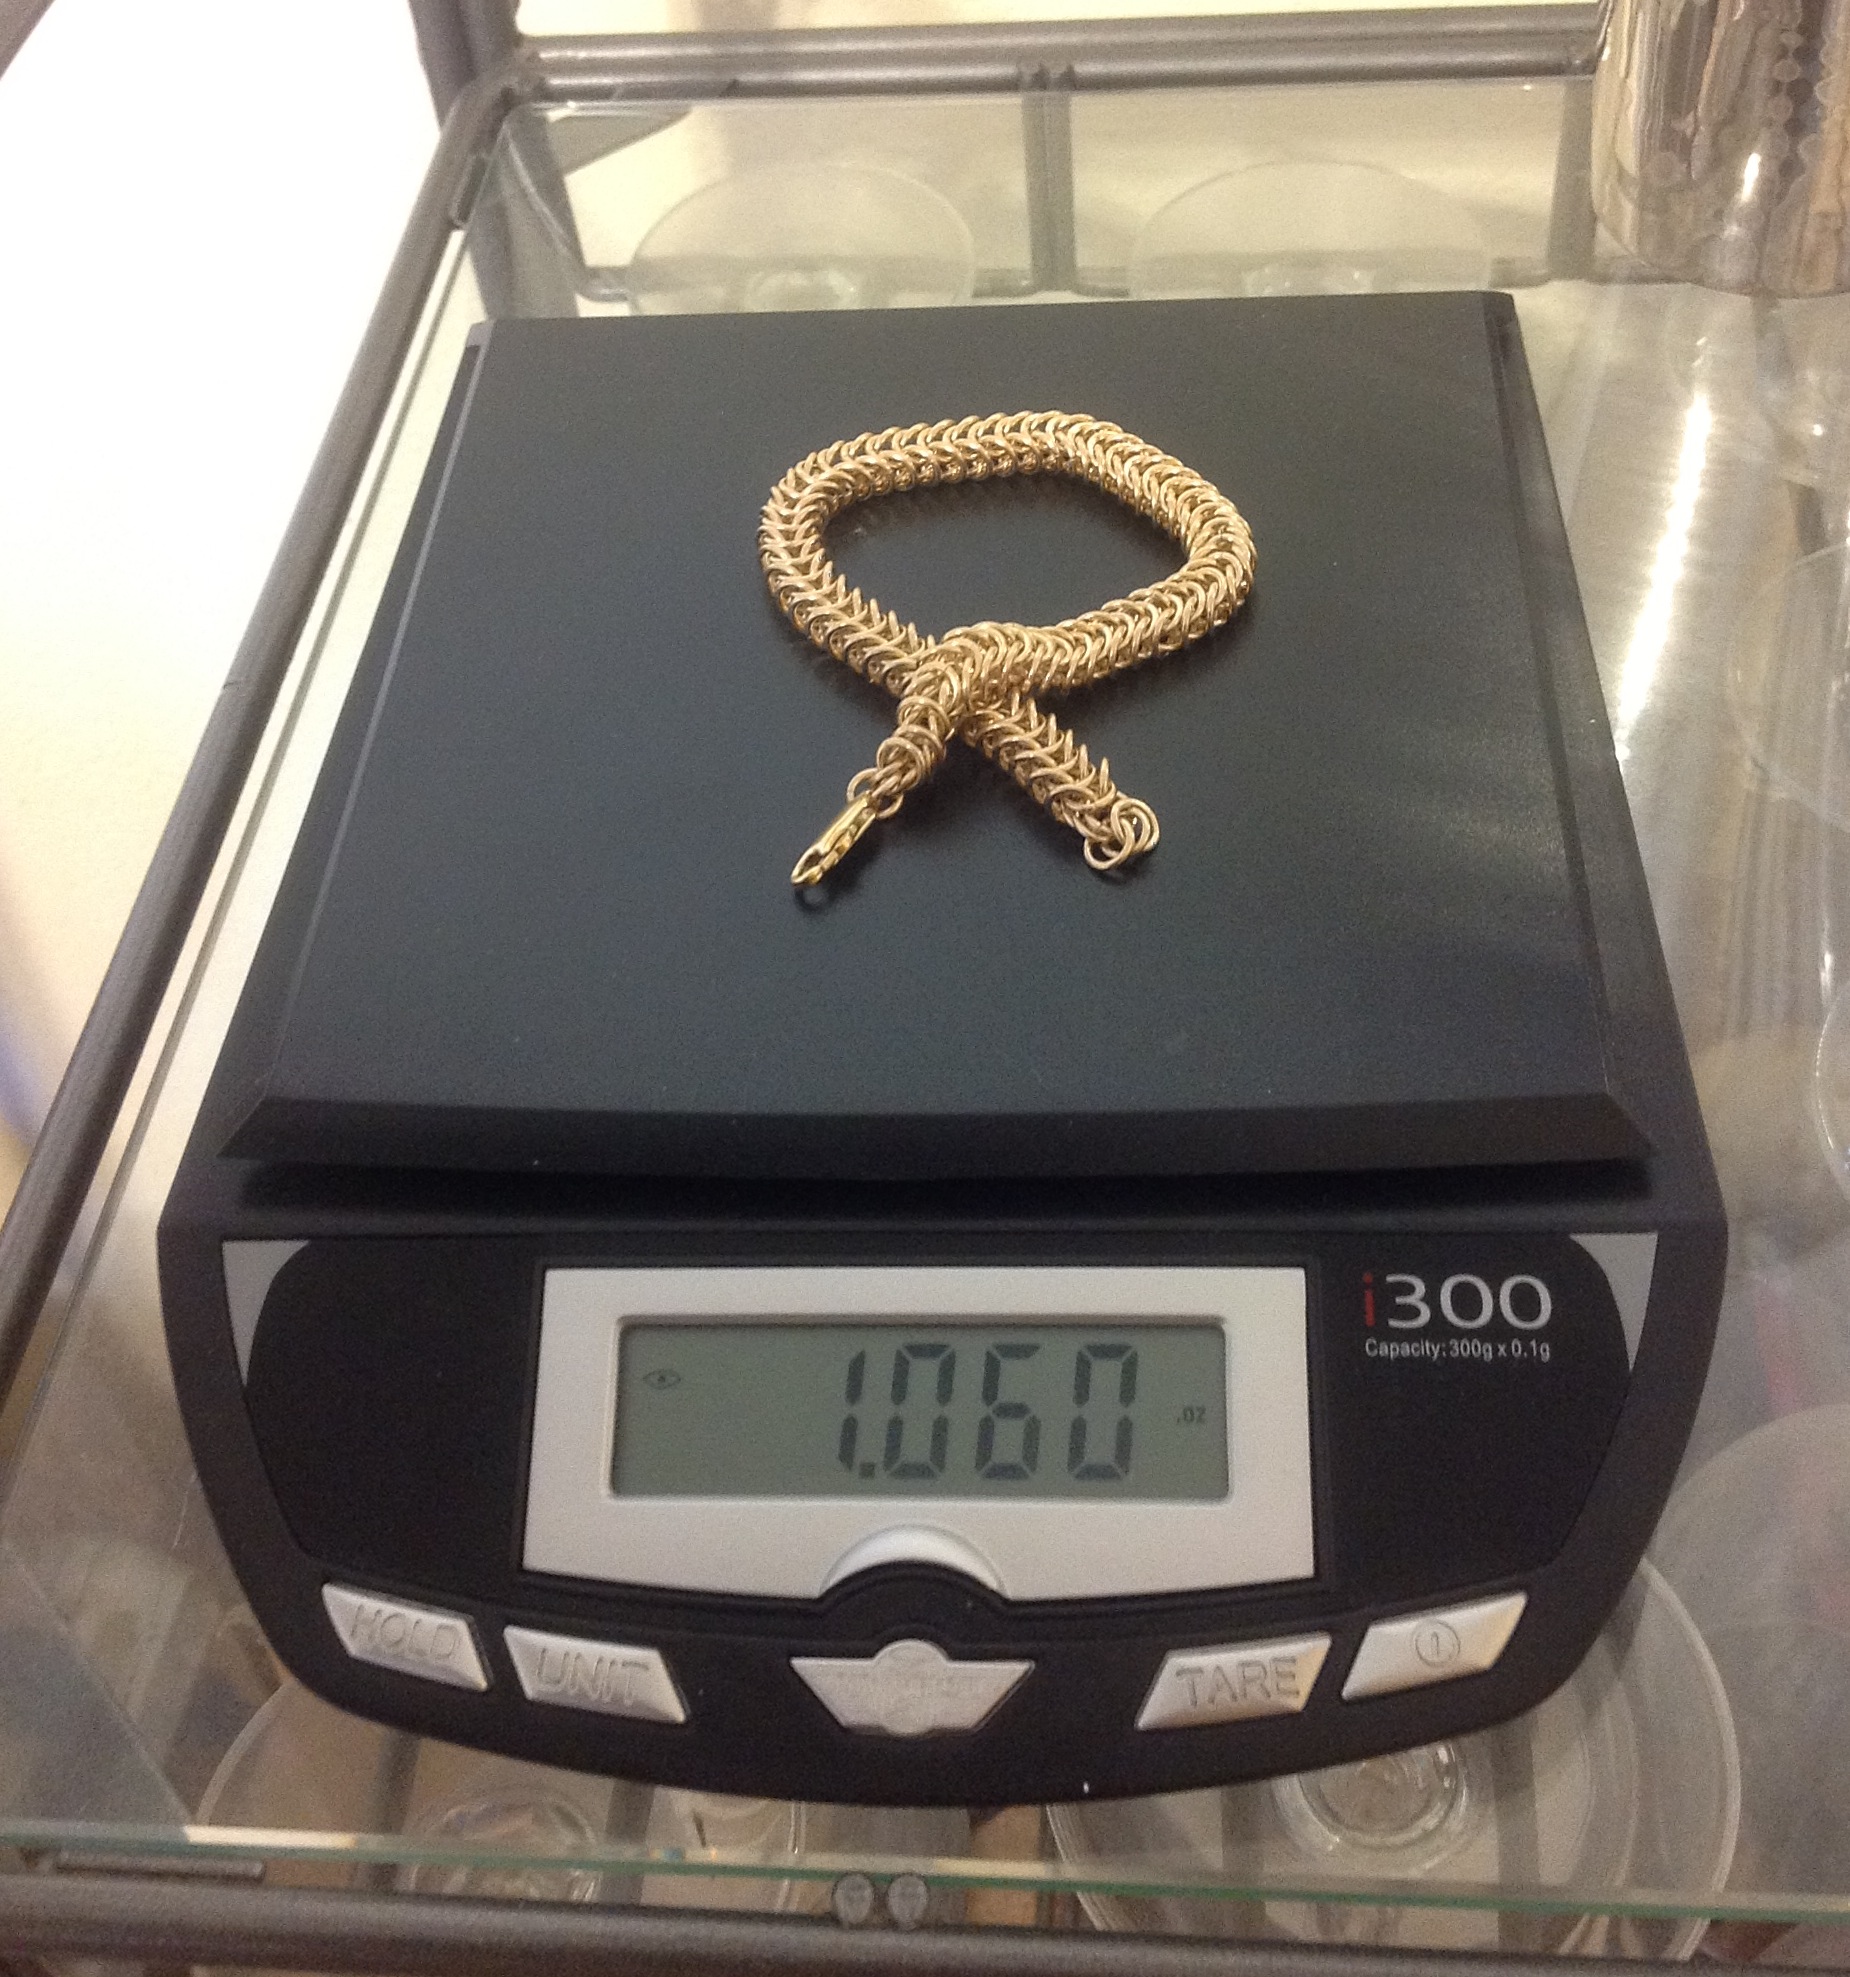
Jewelry Scale
I occasionally get questions about the weight of various pieces, particularly the sterling silver jewelry. I’d take the pieces to the local jewelry supply store and have them weigh the pieces. I’m also using jewelry weight to determine materials costs and prices. I went ahead and got my own scale. I purchased an MyWeigh iBalance 300 digital scale. It works great. Units: ounces, grams, pennyweight, carets. Accurate to 0.1 grams, which is close enough for me. Cost: $35.
Ring Storage
I usually have a lot of rings left over from jewelry projects, and I need a place to keep them organized. Also, when working on, or traveling with, projects, I need a place to keep them straight. What I don’t want is a pile of rings spilling all over my work space.
I have several sets of interlocking storage cases to keep my rings. The smaller cases work fine for most storage, but I also have several larger ones for stones, clasps, and other larger items. They come in sets of 5 or 6 for 3 or 4 bucks in the beading sections of most craft stores.
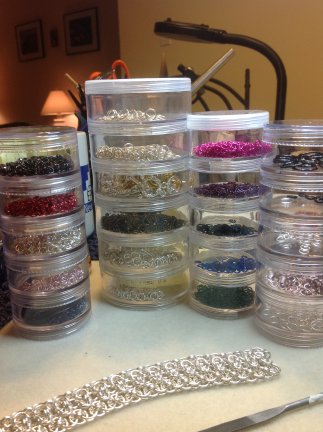
Plastic cases for storing rings
Jewelry Care and Cleaning
Read my blog post on cleaning and caring for your jewelry. Topics include
- General cleaning
- Light polishing
- Removing tarnish
- Tumbling
- Avoiding tarnish
- Damage from stress
- Repairs
Click here to read about jewelry care.
My Chainmaille Tutorials (external links)
- Full Persian Made Easy
- Viper Basket Made Easy
- Candy Cane Cord Made Easy
- Half Persian 4-1 Made Easy
- Dragonscale Speed Weaving
Chainmaille Tutorials (external links)
- 178 Weaves: Not really a tutorial, but images of 178 different weaves (some of which are variations on other weaves). Many have links to tutorials. A great display of weaves.
- The Ringlord: Only a few weaves here, but the tutorials are nicely done and easy to follow.
- David Chain Jewelry: Good step-by-step images of a few fundamental chain weaves.
- Maille Artisans International League (MAIL): This links to the weaves index. It’s big. Many of the weaves here have links to their tutorials
- Maillers Worldwide: A huge selection of tutorials for a huge variety of weaves.
- Video: Best method for making the Full Persian: This is not my video, but this is the method I use.
- Best photo instructions for Turkish Round: These are not my instructions, but this is the method I use.
- Video: Best method for making the Jens Pind Linkage: Again, not my video, but it’s the best one I’ve seen yet.
- Video: Jewelry Making Process: from Wire to Polished Bracelet: This is one of my posts and videos. I show the step-by-step process for making a bracelet.
My Favorite Suppliers (external links)
Contenti: I ordered the Pepe / Flexishaft combo from them, and I get most of my silver-plated wire and all my saw blades from them, too. Good price. Reliable. USA company.
Rio Grande: I made my first visit to their shop / warehouse recently, and I was quite impressed. I’ll be a regular customer, both in-person and on-line. Good price. Nice people. Huge catalogue. USA company.
